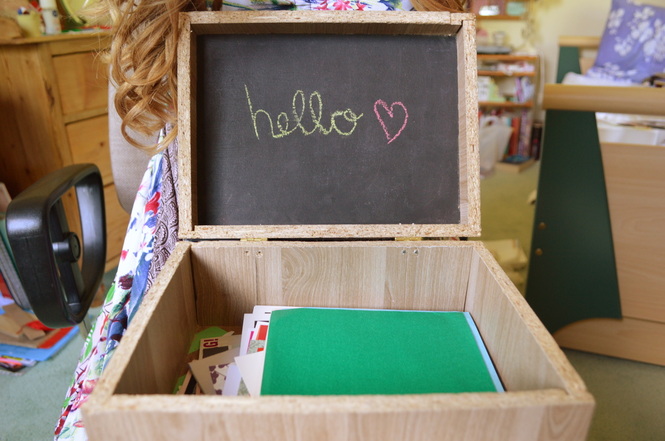
This year, in school, we were allowed to choose our own project! Since we have a few cool machines, I was determined to create something that would be useful and made with the laser cutter (which would be the first time for me). I decided to go for a good old box!
I know, I know it sounds really boring but it's so simple that I thought I could make it extra unique!
If you want to make your own box, here's the place to be :D
However, please note that I am not an expert in actual building tutorials, if I have missed something or given fague information please comment below so that I can specify :) Also, I needed to take most of these pictures at school which means the quality is not terific.
*You can find the 'read more' button in the bottom right corner
you will need:
- 2 long pieces of wood 25x9.5cm ( I was forced to use old scraps which is why the measurements might seem odd and I believe the type of wood I used turned out to be old floor boards)
- 2 short pieces of shorter wood 17x9.5cm
- 2 pieces of plywood 18.5x25cm (for the lid and the bottom)
- 2 small gold hinges
- 8 screws
- chalkboard paint
- mint-green paint
- clear varnish paint
- 3 paint brushes (please note that 2 of these paint brushes will get messy and they are very hard to clean!)
Step one:
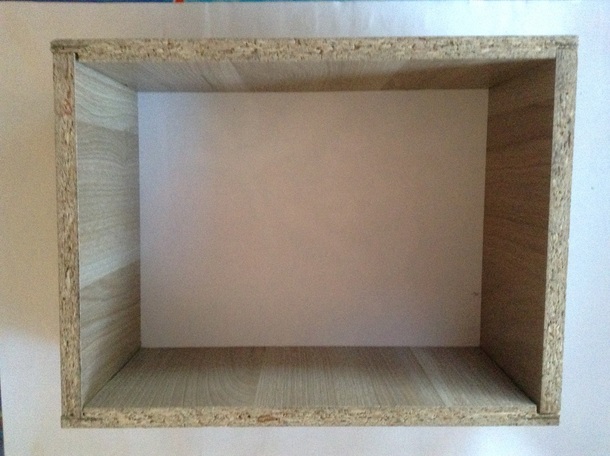
Use wood glue to stick all four pieces of floorboard wood together (I cut off small corners of all sides of the longer pieces of wood to make the sides less visible)
Use wood glue to stick all four pieces of floorboard wood together (I cut off small corners of all sides of the longer pieces of wood to make the sides less visible)
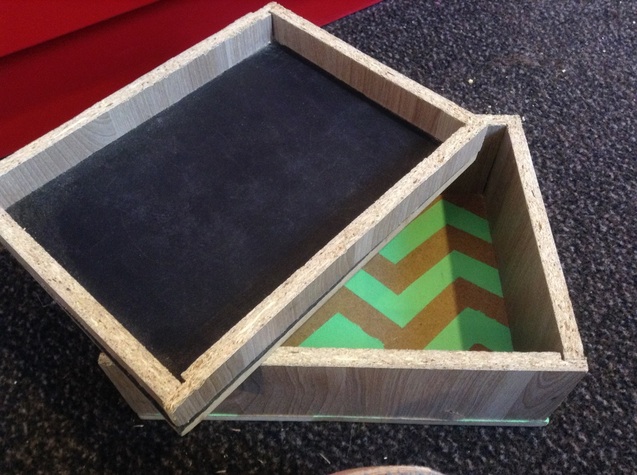
Step 2:
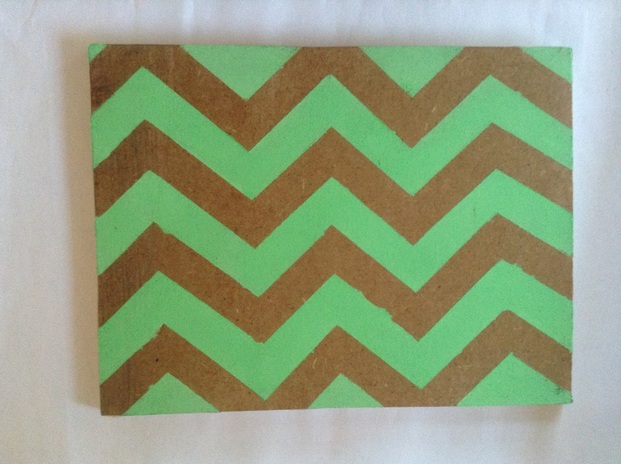
Paint one side of one piece plywood (this will be the inner, bottom piece). I chose a shevron pattern by simply using tape to cover parts of the wood. Then I painted the entire side and removed the tape once it was completely dry. I later painted over the pattern with clear varnish to ensure that it cannot be scratched or marked.
Paint one side of one piece plywood (this will be the inner, bottom piece). I chose a shevron pattern by simply using tape to cover parts of the wood. Then I painted the entire side and removed the tape once it was completely dry. I later painted over the pattern with clear varnish to ensure that it cannot be scratched or marked.
Step 3:
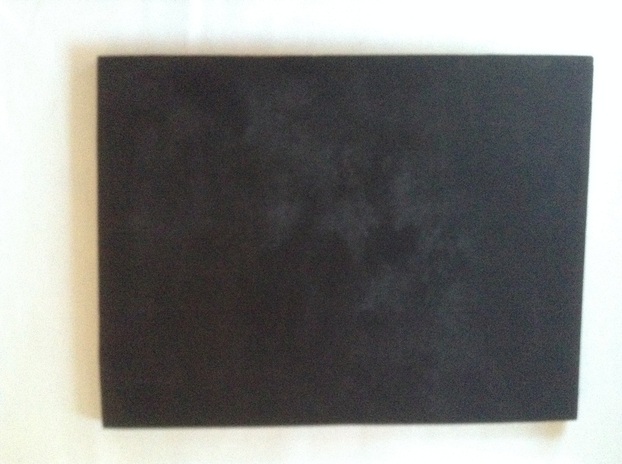
Paint the other piece of plywood with black chalkboard paint (you can also buy another colour and get creative). Since chalkboard paint is a true pain, make sure that the entire piece is dry and cover it with another few layers. Because I didn't like the lines that my paint brush was leaving, I chose to dab the final layer with a bit of toilet paper to create a smoother surface.
Paint the other piece of plywood with black chalkboard paint (you can also buy another colour and get creative). Since chalkboard paint is a true pain, make sure that the entire piece is dry and cover it with another few layers. Because I didn't like the lines that my paint brush was leaving, I chose to dab the final layer with a bit of toilet paper to create a smoother surface.
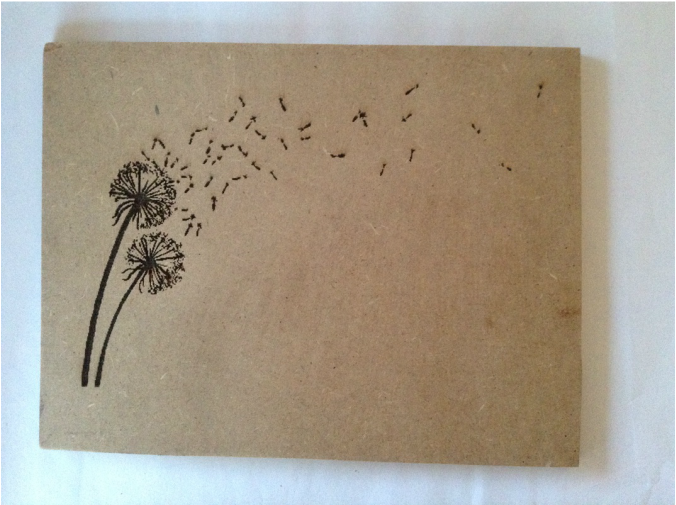
Step 4:
This is my favourite step - the laser printer!
Find an image that you like and print it onto the other side of lid (the chalkboard side should be on the other side of the piece of wood). If you cannot get hold of a laser printed, feel free to paint or carve something on it yourself!
This is my favourite step - the laser printer!
Find an image that you like and print it onto the other side of lid (the chalkboard side should be on the other side of the piece of wood). If you cannot get hold of a laser printed, feel free to paint or carve something on it yourself!
Step 4:
Glue the bottom and top of your plywood to the rest of your box (make sure the inside of the box is empty because otherwise you'll be stuck with a closed and glued box!)
Glue the bottom and top of your plywood to the rest of your box (make sure the inside of the box is empty because otherwise you'll be stuck with a closed and glued box!)
Create the lid by sawing the wood 3cm from the top. Use strong and straight saw because this might be slightly tricky!
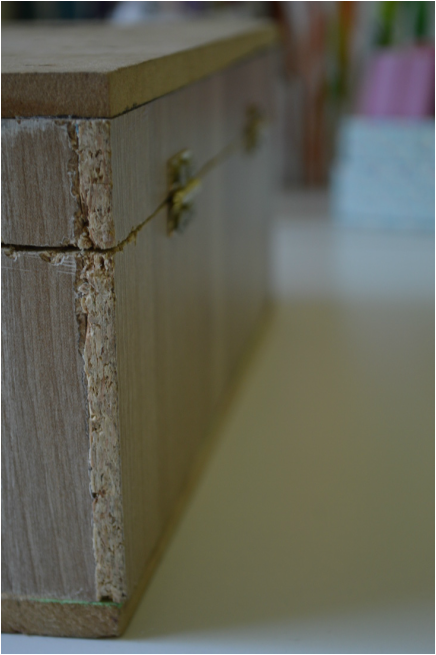
Step 6:
secure the two hinges 5cm from each edge. Break the screws on the inside of the box to make sure that they don't scratch you everytime you use it.
secure the two hinges 5cm from each edge. Break the screws on the inside of the box to make sure that they don't scratch you everytime you use it.
So there it is! Your own box that can be used for anything. I hope you liked this post, it's a bit more crafty than my previous posts.